Pages

Thursday, July 8, 2010

My office has color!

Yes, you read that right, I FINALLY painted our office! While most people choose to sit around the pool and bbq over the July 4th weekend, I was hard at work Saturday painting. It was a long day, but I am very pleased with the outcome - yay color! I chose the color "Wythe Blue" by Ben Moore, but opted to buy Lowe's brand of paint, Valspar, to be on the cheap side. That may have been my only big mistake. I ended up using close to three gallons of paint. I think if I had gone with the better quality, Ben Moore, it might have been different. I think the root of all evil turned out to be the walls themselves. Unfortunately all the walls in our home are textured, therefore getting paint to cover every nook and cranny took a lot of rolling.

First up was taping around the windows and french doors. I used green Frog Tape, which was awesome, I highly recommend it.


Next I cut in along the ceiling, around the windows and the wall joints. I wasn’t planning on taping along the floorboards, but after painting around the ceiling I quickly learned taping would be the best option – and I’m so happy I did. The frog tape created a clean, crisp edge.


I used a roller for the walls, and ended up painting two full coats, then touched up some missed spots. I removed the tape, let it all dry over night, and voila! It feels so nice to have a little color in our all beige house. --DS


Thursday, July 1, 2010

An easy way to test paint samples on your walls

I've been trying to decide on paint colors for various rooms in our house for awhile now. There are paint swatches all over my house, it's ridiculous. I recently learned a new trick from a designer that I wanted to share, and wish I had thought of from the get go.

To avoid the not so attractive paint blocks all over your walls, just paint the color sample on posterboard. Yes, go out and buy a sheet of posterboard that we used for projects back in school (it felt kind of funny to buy a few sheets, I had flashbacks of the millions of times I used them back in the day). Cut the posterboard in half, unless you want a really large sample. Then use painters tape (I used the green frog paint tape I had on hand), and tape it down to a table or counter, shiny side down, so you paint on the matte side. Leave an inch or so border on the posterboard when you tape. Paint the posterboard, then leave it taped down until the paint dries. Slowly peel off the green tape from all sides, and you've got a great large color block of your sample! Use the painters tape to tape it on the wall in the room you want to paint.


What's great is that you can move the posterboard around to different walls in the room to see the color in different lighting. And if you're like me and now have two shoe boxes full of different colors, be sure to write the paint color on the posterboard so you won't have to guess what it is later!!

I think I'm going to finally paint the office this weekend - pics to come next week! --DS

Sunday, June 27, 2010

New couch and a table that actually fits!

Our new sectional couch was finally delivered last week. Josh is giving it a test run by taking a nap. The corner wedge is definitely comfortable.


Kirin visited this weekend - yay, a visitor!! Of course I was happy to see her for many reasons, but I've been especially looking forward to having her here because she has great taste in home decor. I've been overwhelmed with the blank slate I have with my new home. Even though she was a little under the weather, we accomplished a lot. We bought a kitchen table and chairs from World Market that actually fit in the space, it looks great!


We also picked up some nightstands for the master bedroom (I'll post pictures of these soon, along with our new PB headboard). I finally decided on paint colors for the house and plan to start with the office in the next couple weeks. Lots of fun projects and updates to post soon!!! THANK YOU KIRIN!!!! --DS

Friday, June 11, 2010

Happy Friday

From little Brutus.


Crazy Brutus and Lolo in action.

Cleaning up the garage

Last weekend we finally got around to painting the garage floor (we were "planning" to do so before moving in back in April). We first swept out the garage, then Sabrina went crazy with the powerwasher to really get the grime off. After letting the concrete dry overnight, we then got to painting! We used the "Epoxy Garage Floor Coating" kit from Quikrete. Since we have a two car garage we needed two of these kits, in gray.


Here is a "before" picture of the garage.


We used a brush to paint all the edges, then used a roller attached to an extension pole to paint the floor. There are color flakes included in the kit that you sprinkle on the wet paint to add some texture or glitz to the floor. If you use the flakes you have to paint in small sections. Paint then sprinkle, paint then sprinkle. I painted, Sabrina sprinkled. Here's a shot of the work in progress.


Here is a closeup of the color flakes.


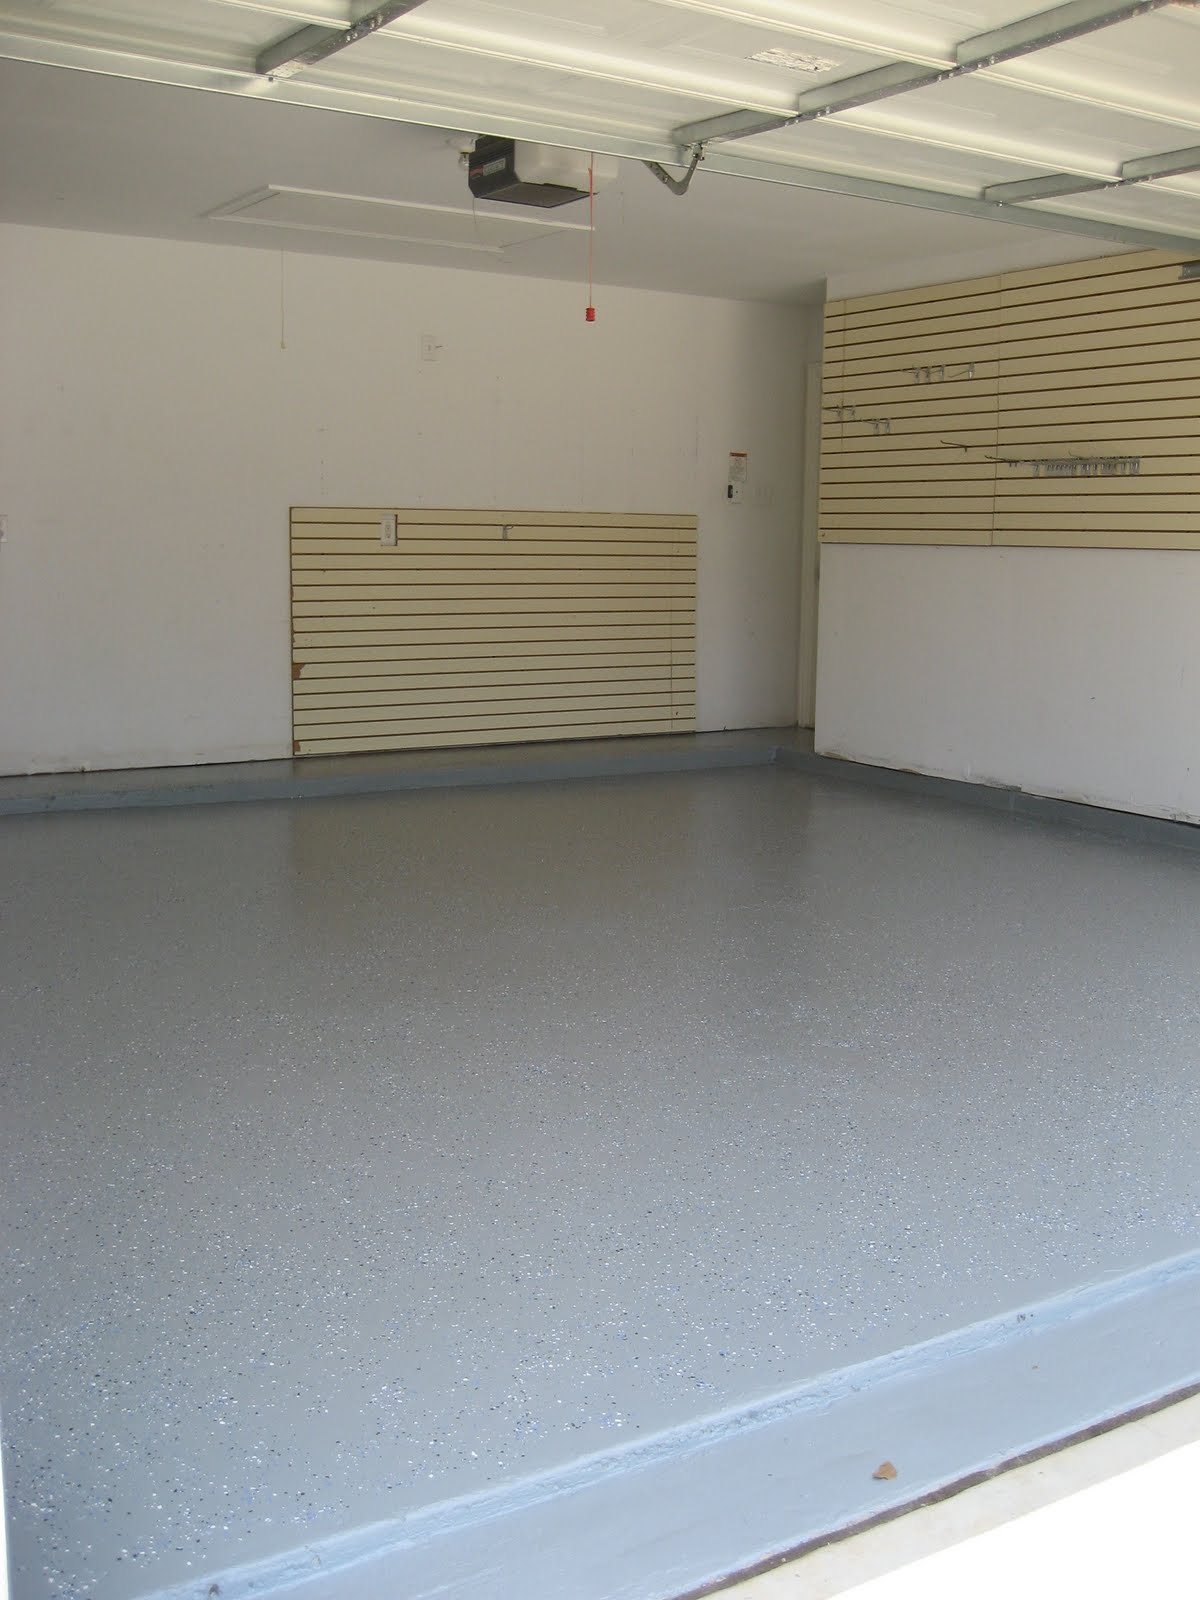
A couple hours later, here is the finished product!!!


It looks soooo much cleaner and slick. The coating will make it much easier to clean oil drips, etc. Just hose it down! Now we just have to repaint the walls....some day. --DS

Saturday, June 5, 2010

Denver House....

Here are SOME photos of the house...as you can see- there's a lot of beige we need to paint over ..... So far we've only tackled the bedroom- the color is called "Rocky Mountain Sky"- how could I not pick that one! Anyways...these will suffice for the "before" photos...hopefully the "after" photos will be coming soon! :)- AY


Project "Veggie Garden"


Last weekend Mark and I finally put in the veggie garden! We have 5 tomato plants, 2 pepper plants, and basil and mint going strong! It was back breaking work but we sweated it out! So far we have a few veggies starting to grow- can't wait to start on the next garden! We have about three more major spots to convert...- AY